[SOLVED] Windows Server 2016 issues

iTodd

Contributor
Joined
Nov 14, 2023
Posts
23
I've used SFC and DISM for a variety of repairs. I simply cannot install Windows Updates or .net 4.8. I've attached the component scanner.log, addition.log, SFCfix.log, frst.log, and cbs.zip files. Installing these updates and upgrading the server from 2016 to 2019 is my objective. I had to restart the server after attempting to upgrade it to 2019, as it remained at 30% for nine hours. I discovered that there is more OS server 2016 damage in addition to the updates not functioning. I genuinely appreciate your assistance.
 

Attachments

Hi and welcome to Sysnative,

Upload your COMPONENTS hive.
  • Navigate to C:\Windows\System32\Config and locate the COMPONENTS file.
  • Please copy this file to your desktop.
  • Note: If you receive an error that this file is in-use, simply reboot your computer and try again.
  • Right-click on this file on your desktop and select Send To > Compressed (zipped) folder. This will create a file named COMPONENTS.ZIP on your desktop.
  • If the file is too large to upload here, upload the file to www.wetransfer.com and post the link in your next reply.
 
I want to say nice to meet you and thank you for the response. Since this server is being used at the moment, we will have to wait until lunch time to restart, which will be in 3 hours. Once I restart the server, I will send it to you.
 
Thanks, please do the following to replace the current COMPONENTS hive.

Step 1. Replace Components Hive Manually

Warning: this fix is specific to the user in this thread. No one else should follow these instructions as it may cause more harm than good. If you are after assistance, please start a thread of your own.
  1. Download COMPONENTS.ZIP and save to your desktop.
  2. Right-click on it and select Extract all.... Make sure the "Show extracted files when complete" is checked and click Extract.
  3. Now we have the COMPONENTS file that we will be using to replace your current one.
  4. Navigate to C:\Windows\System32\config
  5. Right-click on the current COMPONENTS file and select rename. Rename it to COMPONENTS.bad.
    Note: If you get an error that the file is in use, reboot your computer and then try again.
  6. Take the file from the Components folder on your desktop and paste it into C:\Windows\System32\config

Step 2. Reboot the server and run
61f7aba7309a1-ComponentsScanner_Icon.png
ComponentsScanner again.
  • Right-click ComponentsScanner.exe and select "Run as administrator", click Yes on the UAC (User Account Control) prompt which appears.
  • Follow the on-screen instructions.
  • Once complete, a report will be saved to your desktop called ComponentsScanner.txt.
  • Post the logfile ComponentsScanner.txt as attachment into your next reply.

Step 3. Run the following DISM command and post the result. If it fails attach a new copy of the CBS log.
Code:
DISM /online /cleanup-image /RestoreHealth
 
Hi,

Step 1. Download
6530fbb0f4101-56f31e53c97da-SFCFix.PNG
SFCFix and save it to your desktop.

Warning: This fix was written specifically for this system. Do not run this fix on another system.
  • Save any work you have open, and close all programs.
  • Download the attachment SFCFix.zip and save it to your desktop.
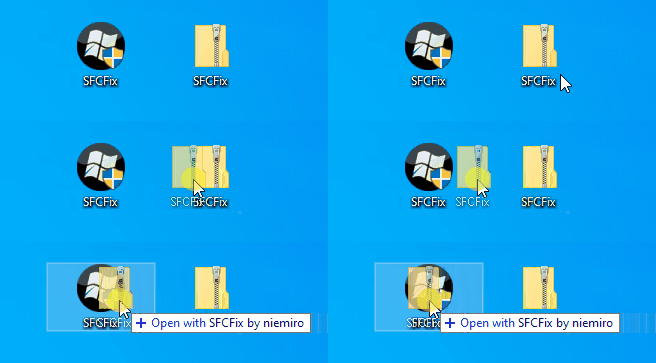
  • Drag the SFCFix.zip file over the SFCFix.exe executable and release it.
650c22f99662d-6190d993a26f3-SFCFix-Zip-Eng.gif

  • SFCFix will launch, let it complete.
  • Once done, a file will appear on your desktop, called SFCFix.txt.
  • Post the logfile (SFCFix.txt) as attachment in your next reply.


Step 2. Run the following DISM command and post the result. If it fails attach a new copy of the CBS log.
Code:
DISM /online /cleanup-image /RestoreHealth
 

Attachments

I was able to perform SFC thus far, and it successfully fixed a lot of corruption. I'm doing the DISM right now, and I think this will work. I'll update you to make sure everything is functioning properly. You guys really do have the compassion to help us, even though you didn't have to, so I have also donated on your behalf.
 
You're welcome and thanks for your donation to Sysnative. If DISM completed succesfully without any errors run the ComponentsScanner again. If DISM failed attach a new copy of the CBS logs first.

Run
61f7aba7309a1-ComponentsScanner_Icon.png
ComponentsScanner again.
  • Right-click ComponentsScanner.exe and select "Run as administrator", click Yes on the UAC (User Account Control) prompt which appears.
  • Follow the on-screen instructions.
  • Once complete, a report will be saved to your desktop called ComponentsScanner.txt.
  • Post the logfile ComponentsScanner.txt as attachment into your next reply.
 
This time it got to 99.1% and then failed 0x800f081f. The source files could not be found.
 

Attachments

Here's the next fix.

Step 1.
Warning: This fix was written specifically for this system. Do not run this fix on another system.
  • Save any work you have open, and close all programs.
  • Download the attachment SFCFix.zip and save it to your desktop.
  • Drag the SFCFix.zip file over the SFCFix.exe executable and release it.
650c22f99662d-6190d993a26f3-SFCFix-Zip-Eng.gif

  • SFCFix will launch, let it complete.
  • Once done, a file will appear on your desktop, called SFCFix.txt.
  • Post the logfile (SFCFix.txt) as attachment in your next reply.


Step 2. Run the following DISM command and post the result. If it fails attach a new copy of the CBS log.
Code:
DISM /online /cleanup-image /RestoreHealth
 

Attachments

Hi,

Here's the next fix with the uncompressed payload files.

Step 1.
Warning: This fix was written specifically for this system. Do not run this fix on another system.
  • Save any work you have open, and close all programs.
  • Download the attachment SFCFix.zip and save it to your desktop.
  • Drag the SFCFix.zip file over the SFCFix.exe executable and release it.
650c22f99662d-6190d993a26f3-SFCFix-Zip-Eng.gif

  • SFCFix will launch, let it complete.
  • Once done, a file will appear on your desktop, called SFCFix.txt.
  • Post the logfile (SFCFix.txt) as attachment in your next reply.


Step 2. Run the following DISM command and post the result. If it fails attach a new copy of the CBS log.
Code:
DISM /online /cleanup-image /RestoreHealth
 

Attachments

I apologize for the delay in responding to you. I performed an SFC and an upgrade from 2016 to 2019 on Friday night. All Windows updates were able to be installed, and the upgrade was completed properly. I want to sincerely thank you for your assistance.
 
Hi,

You're welcome. Glad you were able to upgrade to Server 2019 this time...(y)
 

Has Sysnative Forums helped you? Please consider donating to help us support the site!

Back
Top