There could be several reasons why you want to install Windows 11 without an active internet connection.
1. Disable your LAN/WiFi connection (or remove any virtual network adapter into the VM settings).
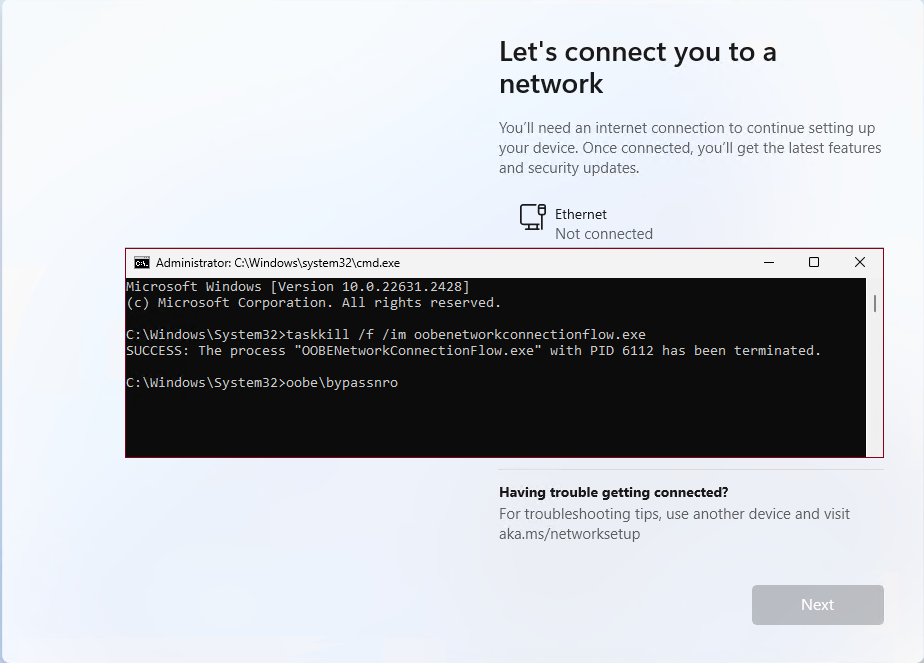
2. Boot the System / VM from the Windows 11 ISO and follow the instructions till the following screen appears.
3. Press SHIFT + F10 to open the command prompt.
4. Now enter the following commands:

5. When the last command is executed, the system will reboot automatically.
6. After this, you have to set some of the things (country / region / keyboard layout) again you have already set up before.
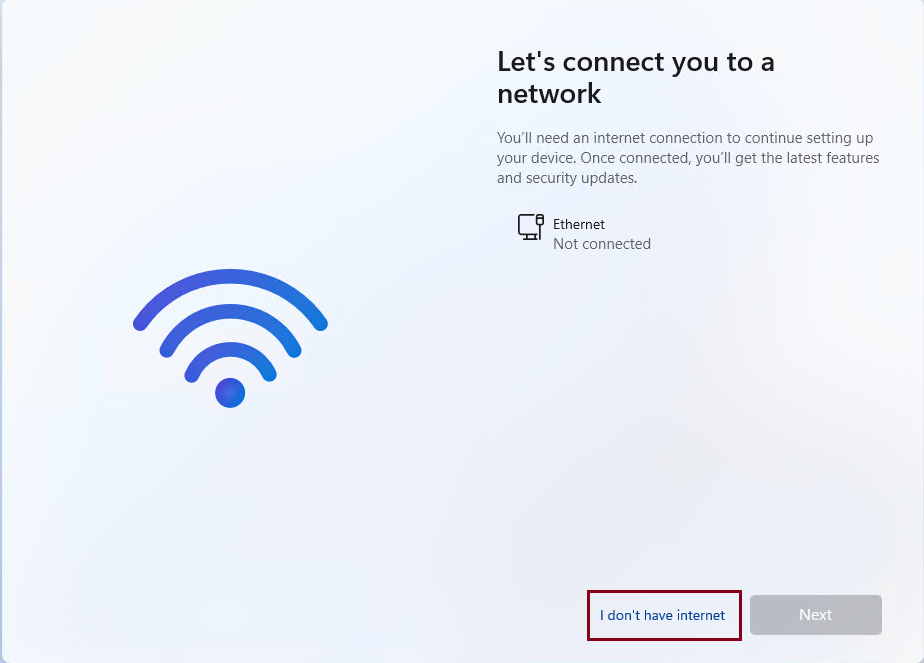
7. But now you will see the following screen and the option I don't have internet.

8. In the following screen press the option Continue with limited setup.
9. Now you can create an local account and finish the installation within a few minutes without any additional (optional) settings and or automatic updates which could be time consuming.
- You want to setup the installation with a local account.
- You have a slow internet connection and you want to delay the automatic updates until after installation.
- You want to install the RTM build (specific ISO) without the automatic updates during the installation process, just to be able to install specific Servicing Stack Updates and/or Cumulative Updates.
- You want to install a base template to deploy in other (virtual) environments.
1. Disable your LAN/WiFi connection (or remove any virtual network adapter into the VM settings).
2. Boot the System / VM from the Windows 11 ISO and follow the instructions till the following screen appears.
3. Press SHIFT + F10 to open the command prompt.
4. Now enter the following commands:
Rich (BB code):
taskkill /f /im oobenetworkconnectionflow.exe
oobe\bypassnro
5. When the last command is executed, the system will reboot automatically.
6. After this, you have to set some of the things (country / region / keyboard layout) again you have already set up before.
7. But now you will see the following screen and the option I don't have internet.

8. In the following screen press the option Continue with limited setup.
9. Now you can create an local account and finish the installation within a few minutes without any additional (optional) settings and or automatic updates which could be time consuming.
Last edited:
