Perform a Disk Check Outside Windows Vista or Windows 7
Access a Command Prompt using the Windows Install Disc:
Access a Command Prompt from the Windows System Recovery Options:
Run the Disk Check:
Warning
You may want to backup your important files prior to running a disk check. A disk check with the /r flag can cause files to be incomplete if there are bad sectors on the hard disk; this is due to the recovery of bad sectors and possible problems recovering the data within those sectors. To backup your files: Copy and Paste Outside Windows Vista or Windows 7.
Access a Command Prompt using the Windows Install Disc:
- Insert the Windows Installation Media and restart your system.
- Before you can use the installation media, configure your BIOS for the proper boot order. The installation media should be the first option in the boot menu, i.e. your CD/DVD drive or USB drive.
- Refer to your system manual for steps to enter the BIOS and change boot order settings. Most system manuals can be found online through the system manufacturer (Dell, HP, etc.) or motherboard manufacturer (Gigabyte, ASUS, etc.).
- If you cannot find your installation media, please contact your system manufacturer (Dell, HP, etc.) to replace missing recovery discs or contact Microsoft to replace a missing retail copy. If you were not provided with installation media, you may need to purchase a retail copy from an online or local store.
- Before you can use the installation media, configure your BIOS for the proper boot order. The installation media should be the first option in the boot menu, i.e. your CD/DVD drive or USB drive.
- Press a key when given the message to Press any key to boot from CD or DVD...
- You'll see a screen that says Windows is loading files...; this may take a few minutes depending on the speed of your DVD drive or USB drive.
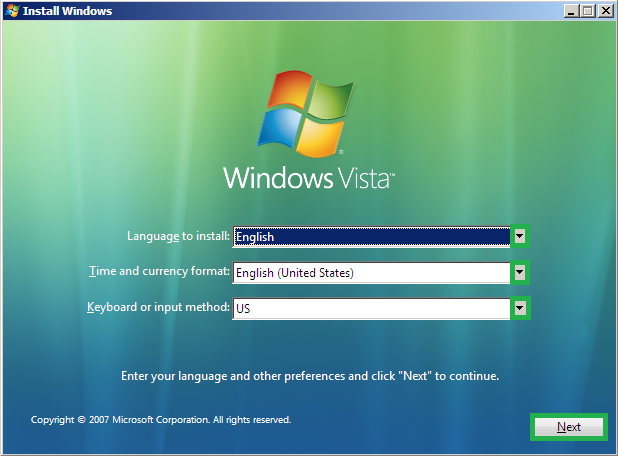
- Choose your installation options and click Next.

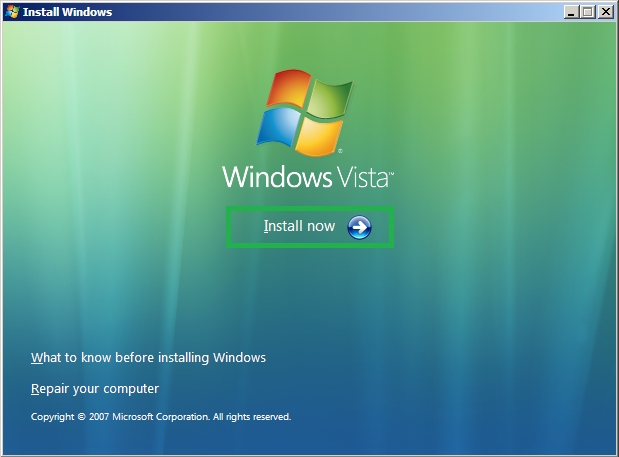
- Choose Install Now.

- Press Shift + F10 when the installer loads.
Access a Command Prompt from the Windows System Recovery Options:
Access the Windows Recovery Options and then select Command Prompt.
Run the Disk Check:
- Once you have a command prompt available, do the following with all possible drive letters until you get the message that the volume could not be opened for direct access.
WarningUse the /f flag instead of the /r flag if you have a solid state drive installed
Code:chkdsk /r c: chkdsk /r d: chkdsk /r e: chkdsk /r f:
- For any drives that do not finish without problems, run the disk check again as above. The message when the disk check finds no problems is:
Windows has checked the file system and found no problems
In other words, if the message is as follows after running the disk check, run the disk check again.
Windows has made corrections to the file system
- I realize you may only have one disk show up in Windows explorer, but you may have more than one disk through recovery options. This is because the system creates a hidden boot partition (which will be C: in recovery), you may have a recovery partition for your PC that is hidden (which will be D: in recovery), and you will have your primary Windows partition (which may be E: in recovery). A custom PC will likely have at least C: and D: to scan.
- Also, if asked whether you would like to force a dismount on any volumes, choose Y for yes. That message just means the volume is currently being accessed, but dismounting it will not cause any harm.
Last edited:
